
What Most People Get Wrong
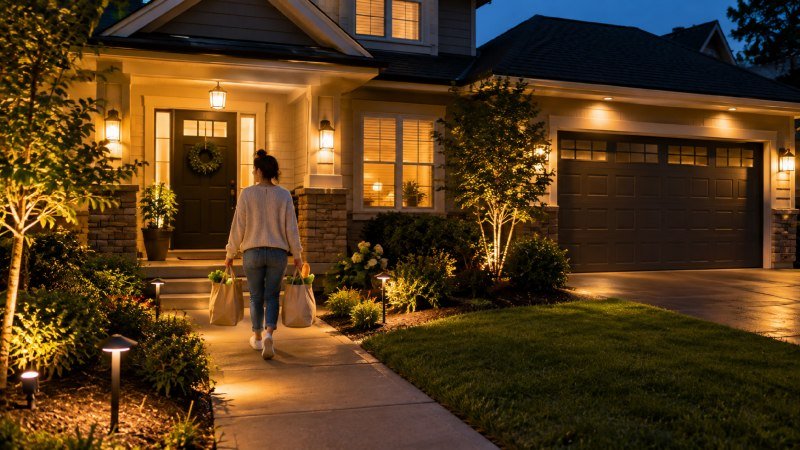
You get home after dark, keys in one hand and grocery bags in the other, and the porch light barely reaches the doormat. The driveway sits in near-total shadow, the side gate disappears into the dark, and a motion sensor near the garage clicks on and off for no obvious reason. This is usually the moment homeowners realize their outdoor lighting was never actually planned. It was simply installed, fixture by fixture, without much thought about how the whole property works together after sunset.
The most common mistake is treating exterior lighting as a single decision rather than a layered system. A bright floodlight over the garage door might feel like enough, but it often creates a harsh pool of light surrounded by deep shadow, which can make a property feel less secure. Homeowners also tend to buy fixtures based on price or shape alone, without checking color temperature, so the porch ends up glowing a cold blue-white while the walkway lights are warm yellow. The mismatch is subtle during the day and glaring at night.
Another overlooked issue is timing and control. Lights that stay on all night waste energy and shorten bulb life, while lights on a single switch mean the whole yard is either fully lit or fully dark with nothing in between. Add in fixtures placed for looks rather than function—a spotlight aimed at a tree instead of a stair edge—and the result is a yard that looks scattered rather than intentional. The real issue is sequence: fixtures get chosen before a plan exists.
What Actually Works
Good exterior lighting starts with function, not fixtures. Walk the property after dark and note where you actually need to see clearly: the front steps, the driveway edge, the path to the trash cans, the door lock. Those are the points that need reliable, even light, while everything else can be softer or purely decorative. Professionals often call this approach layering, since it combines task lighting, accent lighting, and ambient light rather than relying on one bright source to do everything.
Color temperature matters more than most people expect. Warm white light, in the 2700 to 3000 Kelvin range, tends to make a home feel welcoming and blends well with interior window light, while cooler tones can feel clinical outdoors. Placement matters just as much as the bulb itself; a fixture mounted too high washes out detail, while one mounted low and angled correctly can highlight brick texture or a tree’s shape without glare. Timers, dimmers, and motion sensors let a single layout serve different needs across the evening, dimming for ambiance early on and brightening for security later.
Once the layout is mapped, the fixture choice becomes much easier. Pathway lights, step lights, wall sconces, and uplights each serve a distinct role, and mixing a few well-chosen styles usually looks better than a matching set spread everywhere. For homeowners narrowing down options, browsing a curated set of exterior house lighting ideas can shortcut a lot of the trial and error, since the fixtures are grouped by use rather than just style. That structure makes it easier to shop with the plan already in mind, instead of buying pieces first and figuring out placement later.
How to Apply This
Start small and specific rather than trying to redo the entire exterior in one weekend. Pick the two or three spots that cause the most nightly friction—usually the front door, the driveway, and one dark corner near a side entrance—and solve those first. Measure the distance between fixtures before ordering anything, since spacing errors are one of the most common and expensive mistakes in outdoor lighting projects. A rough sketch, even a hand-drawn one, saves a surprising amount of return shipping later.
Before buying bulbs or fixtures, it helps to understand how wattage, lumens, and efficiency actually relate to each other outdoors, since outdoor fixtures often run for many hours a night. The federal ENERGY STAR lighting guidance breaks down how to compare bulbs by brightness and energy use rather than wattage alone, which is especially useful for anyone replacing multiple fixtures at once. Choosing LED options with the right lumen output for each task—brighter near entry points, softer along paths—keeps energy costs predictable without sacrificing visibility where it counts.
Once the plan and fixtures are settled, install in stages and test each section after dark before moving to the next, since daylight testing hides most lighting problems. Adjust angles, swap a bulb’s color temperature if it clashes with neighboring fixtures, and reset timers as the seasons change and sunset times shift. Small corrections made early prevent the scattered, mismatched look that started this whole process. A well-planned exterior lighting setup tends to need only minor tweaks once or twice a year after that first careful pass.